Wednesday, September 28, 2011

Felt, Felt and More Felt

I recently was given a sewing machine. I put out a plea on Facebook asking for a sewing machine for me to learn on. My mom was mortified. She thought that people would think that she never taught me. That was followed by my apology. Sorry Mom!  My mom did try to teach me sew while I was growing up. I just didn't like it as a kid. I rather be in the kitchen and baking. :)

So what do I make for my first project? I decided a pillow cover. I searched pinterest.com for ideas. I decided on a simple envelope pillow case with a huge felt flower on the front.  The pillow is from BedBuggs on Etsy.com.

I loaded up my son, fabric, felt, and my sewing machine and headed to Laura's house for some moral support. Laura helped me make a bobbin, add the thread to the machine, and use her cutting mat and blade. (Threading the machine brought back memories of my mom showing me how to do it.)

I decided to make my own pattern for the pillow. It actually turned out ok! I made the flower with a template that I made with a paper plate. I attached to petals with a hot glue gun and hand sewed it to my new pillow cover.

My new pillow is now sitting pretty on our bed. Now I just need to make more!

On to the next felt project.

I have been helping my family sort through the collections and memories of my Grandma's since she has passed away. The last time I was there, found two really cute buttons among a huge tin that was in a drawer. I figured out my new project.  I made flowers out of the felt I had on hand and glued the buttons in the middle. They turned into really cute pins for my mother. She loved them! That started my "small business."


This past Saturday, my mom had a booth in a local antique show at Saltbox Farm. She asked me to make some pins for her booth. I made just over twenty. I thought that would be plenty. I was happy if I just got my money back in supplies.  Boy, was I surprised! I got a voicemail from my mom at the show asking for me to make more and hurry fast! I never worked so fast with scissors in my life! I can't believe I didn't cut myself. If you didn't know already, I tend to cut myself a lot with my chef knives. :) I made ten more and arrived to the show just after lunch. I sold eight of them while I was there! How exciting! I also had another dealer ask me to make a headband for her daughter.


So this week, I have bought more felt, searched for buttons and made a trial run headband. The next antique show is in just over a month. I have a lot of work ahead of me!

Sunday, September 11, 2011

the curtain dilemma.

in case you don't follow me on pinterest, i have been having the hardest time finding the PERFECT curtains for the living room. i should probably give up and find the ones close to perfect, but i haven't even found that.

forget about the fact [just for a minute] that my husband hates yellow with his whole being, and pretend i was allowed to put it in the living room... then i would pick these:
though i know its a table  cloth (round one pictured), the oblong one is the PERFECT size for our massive window. two of them is cheaper than anything, AND i wouldn't even have to sew them.

i tell you, what is better than that?

maybe yellow will grow on him.

i would show you the window, but i can't get it to load. another day i'll give you the grand tour.

some other options, though none of them make my heart go pitter patter:


it also needs more color than these options provide.

i'll find them, cause they are out there waiting to be found.

Tuesday, September 6, 2011

laura ingalls wilder II

While Kitty was having her corn-shuckin party, i was slaving away at work. you know, making money to pay the mortgage.

Cut to 3 days later when, alas, a day of freedom. My mom texted to see if i wanted to can peaches. CAN PEACHES? of course i did. what better way to spend a day not working?

We decided to buy the peaches rather than pick them, thinking it would save time, and the money savings was pretty small between U-Pick and buying them from the farm. We ran to Blok Orchard early Friday morning, and I was pleasantly surprised! Peach seconds (so, the ones that are not as beautiful as the firsts) were 12 bucks for a bushel. a WHOLE BUSHEL people. that was a lot more than i could handle alone. whew, good thing there was three of us. we all decided its much easier with more than one person.

ran from the orchard to meijer and meijer to mom's. and go!

[on a side note, we realized that we should not have picked the last hottest day of summer. i think 90 degrees was too hot for canning peaches over the stove!]
you can kindof tell that they're seconds... a little bruised. but sitting in a can of sugar for 3 months will solve that!

our littlest helper

blowing kisses before naptime 
[okay, this was not part of the canning process. she's just too precious to ignore.]

that's a lot of peaches, flatman!

we had to pour over our cookbooks. Suz and I have never canned, and mom said it had been "like, 25 years!" since she had. we basically started from square one.

make your sugar syrup to go in with the peaches (we picked the light syrup).
it was as simple as waiting for it to dissolve and boil.

new lids are essential.

cute, huh?

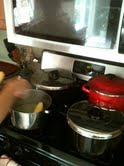
this is acutally a pressure cooker we borrowed from a friend. the pressure cooking looked like it would take too long, so we just used it as a big pot to boil our jars in. boil lots of water. keep an extra pot of water (or a kettle) boiling in case you need to add more water to your pot after adding the peach jars.

jars. it's called canning, but you use jars. huh. just thought of that.

another necessity. the peach jar grabby guy. well, that sounds bad, but this guy was priceless [worth the trip back to meijer to return a broken jar and to retrieve this guy].

once we peeled our peaches, we let them sit in a mixture of sierra mist and water to keep them from browning until our water was boiled enough to add the jars. it worked!

we used the cold pack (or raw-pack) method. saves time! peel and cut the peaches. stuff (and i mean stuff!) them into a jar, and add the syrup mixture, leaving room at the top. clean the top and edge of jar and add a top. place in boiling water. add enough water to the pot to completely cover the jars by at least an inch. boil for 25-30 minutes, then remove and let cool (refer to Betty Crocker for more detailed instructions).

and voila! it was such a good feeling pulling a jar of peaches out of the boiling water, knowing that i will be able to pull these out at meals this winter.
i'm pretty excited.
i felt like laura ingalls wilder.

[side note: see all that space/extra liquid at the bottom? that was our first batch, and we did not stuff the jars appropriately. when i say stuff, i mean pack them in there, or you will have tons of room left. they pack pretty well, acutally, and are no worse for wear]

i'm hoping to do pears too, but that might be more ambtious that i have time for this year. 

but now i know, and i WILL be doing it again. it was worth it, and we're not even to winter yet.


and just for fun, the cutest baby girl ever.


Saturday, September 3, 2011

Corn Shuckin' Party

A few days ago, I was given a huge zucchini. I am regretting that I didn't weigh it. It had to have been 8 pounds! While talking with my friend, Christy about her zucchini brownie recipe; I realized, I had no way of shredding or blending this monster for freezing.  Being nice as always, Christy offered to put it through her blender. We then started talking about other veggies to freeze. We saw in the Meijer paper that ears of corn were only ten cents each! Sweet! I love Cheap! So thus started the talk of a corn shuckin' party.

It ended up being Christy and I with our other friend Ami. Between the three of us, there was just over 100 ears of corn. We set to work first on the zucchini. My monster alone filled five 1 quart freezer bags! Then we sat outside in the shade and shucked our corn while watching all of our kids play in the yard. Surprisingly, it didn't take as long as we thought it would.

Next came the HOT part. We put four pots on the stove and added about 3-4 inches of water to each. Once they started boiling we filled the pots with corn and covered with a lid. It took about 8 minutes to cook the corn. Towards the end we just took them out when they were golden.


Once the corn was nice and golden we laid them single layer on a towel to cool. While a batch was cooling, we were already putting more corn in the pots to steam. It was like clock work!

Once we could touch the corn without saying "OUCH!" We started cutting the kernels off the cob. We were shared two techniques to do this. The first is a nifty tool from Ami's mom. It would cut the kernels off the cob in three -four strokes. It reminded me of a vegetable mandolin. It seemed to work ok. We noticed that it would shred some of the kernels making them "creamy." We stopped using it when Ami cut her finger. We decided blood in the corn wouldn't taste to good. 


The second technique was shared with us by a friend. This was so easy and awesome! All you need is a bundt cake pan and an electric knife. Put the corn cob on the flute of the pan and cut away! The kernels fall into the pan all around. Once the pan is full, put in a large bowl to finish cooling.  Who would have thought?
(Love the Pose)

I bought thirty ears of corn for 3 bucks! This ended up being 16 cups of corn.  We laughed and thought, is this worth it? I think once winter rolls around, we are going to love the fresh taste! This whole production took about two hours to cook, cut and bag 100 ears of corn; and my monster zucchini. 


Sunday, August 28, 2011

Andrea, meet Sharon Osbourne

This past week, I was looking at my hair and decided I need to re-color my hair. It was getting washed out and streaked from the sun. I already had a box of color waiting for me in the cupboard, so I set to work. The color was different from my "normal" hair color, but it was still in the same color family. I just thought a slight change would be nice. Well, I got change! The new color was supposed to be a nice deep red with brown undertones. The color on the box was beautiful. I followed the instructions to the T.

I rinsed the color out and looked at my wet hair, and got nervous. My hair was bright red, even wet! I quickly towel dried my hair, and showed my hubby. He was so sweet about it. He looks at it and said "It's a fun change." I looked back in the mirror and wasn't convinced.  A little while later he looks at me again and said, "It looks like Sharon Osbourne's hair." That was when I realized I needed help. So I texted a pic to Laura.  This is her reply. "Very Red! :) What are you going to do? and Kendra (her co-worker) says anything with alcohol will make it fade faster." Being silly I texted back "So I have to get drunk! :)" Ha ha was her reply.

 
I then decided to call a friend that is a hair dresser for advice. She reassured me that it can be fixed and told me just what to do.  I went to Target first, to show Laura my hair and to get a new box of hair color. Target does not sell semi-permanent hair color, which I was told to get.  I wasn't bummed yet. Sally Beauty Supply is a few doors down.   Walking in, I was quickly greeted from one of the staff. I flat out told her I needed help! She was so nice, and showed me where their hair color was and picked out the perfect shade of Ash Brown.


Later that night, after the kiddo was in bed, I set to work again on my hair.  My friend, told me that the green hue in ash will tame the red in my hair. The whole time the color was setting, I was nervous that I just turned my hair green instead. Wouldn't that be awful! Twenty minutes later I rinsed my hair yet again and looked in the mirror. It was a nice tamed red. Definitely a dyed looking... non natural...kind of hair color, but nice.

I am still getting used to my new color, but I have actually gotten compliments on it. So we'll see, maybe this color will stick around for a while :)

Thursday, August 25, 2011

Zucchini Fries with Sweet Onion Dip

 I (Andrea) was at Penzey Spices the other day and was given a bumper sticker that said "Love People: Cook Them Tasty Food." That is so true! I love to cook yummy recipes and see the enjoyment from my family at dinner time. Tonight, I was over ambitious.  I invited my in-laws over and I made a ton of food!

Earlier I was at the Wealthy Street Farmer's Market and got inspired to cook with all the great fresh ingredients. I came home with carrots, zucchini, red pepper, spaghetti squash, green leaf lettuce, blueberries, and a beef steak. As soon as I got home from the market I took two chicken breasts from the freezer and opened the Ziploc bag and added Italian dressing. I put the steak (I think it was round tip) in a casserole dish and put balsamic vinegar with garlic salt and freshly ground pepper. I set the chicken and steak out on the counter to thaw. As soon as the munchkin woke up from his nap, I set to work. He played in the kitchen and pretended to mix up and taste a treat of his own. I looked up a recipe for Blueberry Cobbler and found a Betty Crocker recipe for Blackberry Cobbler. I thought that would work just great. (So I just searched for it on line because I used a cook book. The online recipe is completely different from the cook book. I will post the recipe in a later blog, because it is worth sharing!)

Next, looked up a recipe for zucchini fries that i pinned on pinterest. I thought I had all the ingredients, except for Pamko bread crumbs. I decided to use the good old fashioned bread crumbs that was sitting in the cupboard.  I prepped the Zucchini and made the Sweet Onion Dip. The dip was super easy to make, and turned out scrumptious! I then realized I was missing a key ingredient for the batter....Parmesan Cheese. So I called my Father-in-law up, who was coming over for dinner, and ask if he could bring their stash over. So I put that whole recipe aside and focused on other dishes until the Parmesan was in hand.

I chopped up some fresh broccoli that needed to be eaten asap along with the a red pepper, onion, carrots, and a green pepper and corn from my own garden. I placed all the veggies on a foil lined cookie sheet and drizzled olive oil over the mixture. Then I added some garlic salt and pepper. I put the veggies under the broiler until the broccoli florets were beginning to brown. It was about 8-10 minutes with a stir in between.  Mmmm! I love roasted broccoli!

I then realized that this meal was a ton of veggies and no starch. Since I have a huge bag of russet potatoes to satisfy my nine p.m. cravings for a baked potatoes, I rinsed off 8 of them and cut them into chunks and into a pot of boiling water.  Soon they became ranch mashed potatoes.  Easiest mashed potatoes to make with out lacking flavor. When mashing the potatoes, add milk, sour cream, salt and pepper and about 4 tablespoons of ranch dressing. It adds a nice zip!

Next,  I heated up the grill for the chicken and steak.  Soon after, my Parmesan cheese arrived and I quickly made my batter for the zucchini fries and threw them in the oven while the meat was on the grill. Surprisingly, the timing worked out well! The meat was finished minutes after the fries came out of the oven.

Wow was it a spread of food. The weather was fantastic, so we all fixed out plates in the kitchen and ate outside on the deck under the huge maple tree.  My mother-in-law loved the zucchini fries and dip. She went back for seconds! I will admit too, I ate my share along with Jory's share. (Jory isn't a veggie lover) I even ate them at nine tonight in place of my baked potato! Now that is saying a lot! :)

So here is the recipe for the fabulous Zucchini Fries and Sweet Onion Dip from King Arthur Flour.
p.s.The comments in green are my own.  Enjoy!


DIP

  • 1 tablespoon butter
  • 1 medium sweet onion, about 1/2 pound, peeled and sliced
  • 2 tablespoons cider vinegar ( I used 1 1/2 TBS White Vinegar and 1/1 TBS of apple juice)
  • 2 tablespoons honey
  • 1 tablespoon prepared mustard (Deli Mustard Worked)
  • 1 cup mayonnaise
  • salt and pepper to taste

ZUCCHINI STICKS

  • 3 medium zucchini, unpeeled, cut into 3"-long stick
  • 1 tablespoon salt
  • 1 cup Panko bread crumbs (The old fashioned bread crumb worked, but i know Panko would give a better crunch)
  • scant 1/2 cup freshly grated Parmesan cheese (This is called "Stinky Foot Cheese" in this house!)
  • 1 tablespoon Pizza Seasoning or mixed Italian herbs
  • olive oil spray
  • 1/2 cup egg substitute; or 2 large eggs; or 3 egg whites, lightly beaten

Directions

1) To make the dip: Melt the butter in a medium frying pan over moderate heat, and add the sliced onions. Cook, stirring occasionally, until the onions soften, then caramelize. This should take between 10 and 15 minutes. The lower the heat, the longer it takes, but the less likely you are to burn the onions.
2) Once the onions are a medium brown, remove from the heat and add the vinegar.
3) Place the onions and vinegar into a small food processor. Add the honey and mustard, and process or blend until smooth. I have a faux Magic-Bullet, worked wonderfully :)
4) Add the mayonnaise and salt and pepper to taste, stirring to combine. Refrigerate, covered, until ready to serve. I added a little more honey to make is a touch sweeter. 
5) To make the zucchini sticks: Place the zucchini sticks in a colander over a bowl and sprinkle with the tablespoon of salt. Let the zucchini drain for 1 hour or longer; rinse and pat dry. (It is amazing how much this veggies sweats! Make sure to pat it dry!)
6) Combine the Panko, Parmesan, and pizza seasoning; set aside.
7) Preheat the oven to 425°F. Line a baking sheet with parchment, and spray the parchment with olive oil.
8) Dredge sticks a few at a time in the egg, then roll in the crumb mixture. Place the sticks on the prepared baking sheet.
9) Bake sticks for 12 minutes, turn over, and bake for an additional 8 minutes, until golden brown and crisp.
10) Serve immediately, with sweet onion dip.
Yield: about 3 dozen zucchini sticks, and 1 1/2 cups dip.

Recipe summary

Hands-on time:
30 mins. to 50 mins.
Baking time:
20 mins. to 20 mins.
Total time:
50 mins. to 1 hrs 10 mins.
Yield:
about 3 dozen sticks